Author Topic: 130lb LBG rod build  (Read 23086 times)

Chris

  • Leopard
  • ***
  • Posts: 690
  • Put me in coach!
    • View Profile
130lb LBG rod build
« on: March 18, 2015, 06:51:02 AM »
phase I. the butt/grips.

decided after some heavy contemplating that id go with Foam and x Flock grip for the grip. Got my custom colored ALPS uni butt a couple days ago so now I can get started!

found this at the hardware store. I was going to do either EVA or cork tape under the X flock but this works well.

Its some kind of PVC foam blend for cushioning pipes and stuff. $10 for 36". I'm going to do a Red white and blue build next so this will work out well for that too.


slipped it over the blank. the ID of the PVC foam was smaller than the OD of the blank where it meets at the top so it was a good snug fit. it stretches well, so all I had to do was work it down by squishing the top down a couple inches then running my hand down the foam to smooth it out and push it down the blank.

got it about 1/4" or less from the furrel.


pull the blank out of the furrel (tape shims where for static testing while in the furrel, ill use dry wall tape to shim it before glueing).


cut it to length (notice the extra on the ends)


heat it up and let it shrink! I did this one over the stove. its the last ill do that way. gets too hot and I almost burned it..... ill be buying a heat gun before my next build. the excess at the bottom also acts as a shim for the furrel.


and there we have it. a 12.5" cushioned for grip. the grips on these rods are just meant for handling the rod while doing anything but fighting a fish. when fighting a fish I or whoever using it will be in a harness and the last place you want your hands is on the grip. pull on the reel or hold onto it that way. this rod will be 7'9" when finished and have over 300lbs of leverage at the tip, pulling on the forgrip is a good way to split your head open if the line breaks.  ;D


Phase II. butt wrap.
Keep it tight

Chris

  • Leopard
  • ***
  • Posts: 690
  • Put me in coach!
    • View Profile
Re: 130lb LBG rod build
« Reply #1 on: March 18, 2015, 08:57:01 AM »
phase II.

spent about an hour or so getting this started. Initial Idea was to have 3 red chevrons, I might do 5. not sure yet. but its late so, TO BE CONTINUED....

Keep it tight

Chris

  • Leopard
  • ***
  • Posts: 690
  • Put me in coach!
    • View Profile
Re: 130lb LBG rod build
« Reply #2 on: March 19, 2015, 02:17:42 AM »
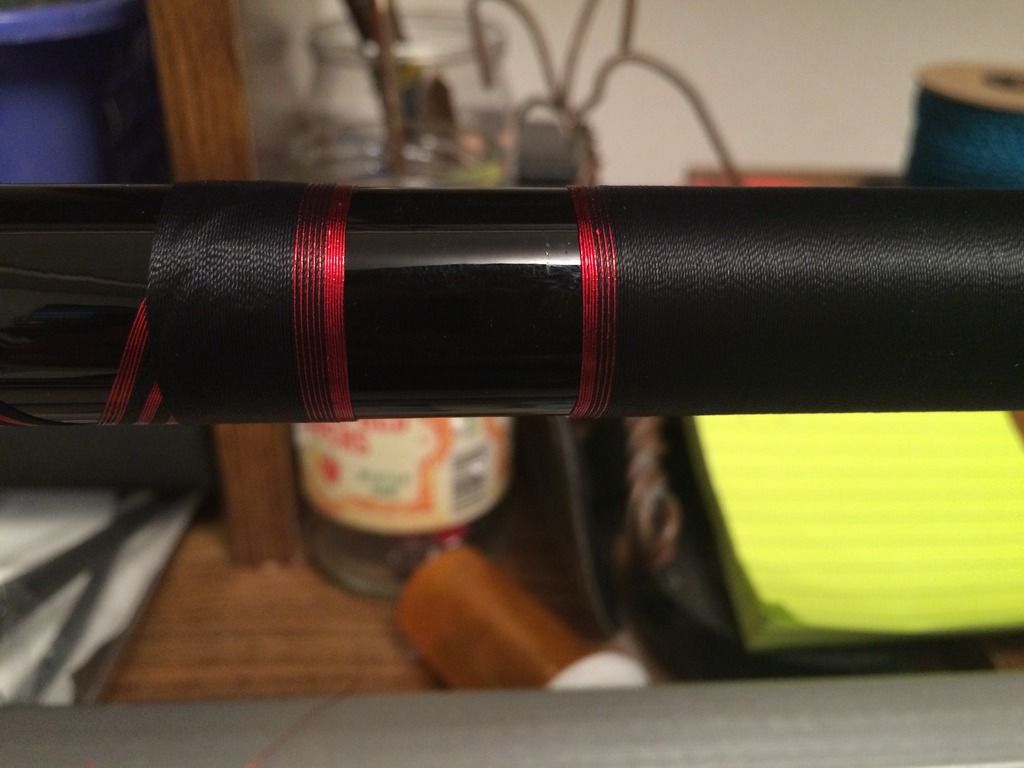
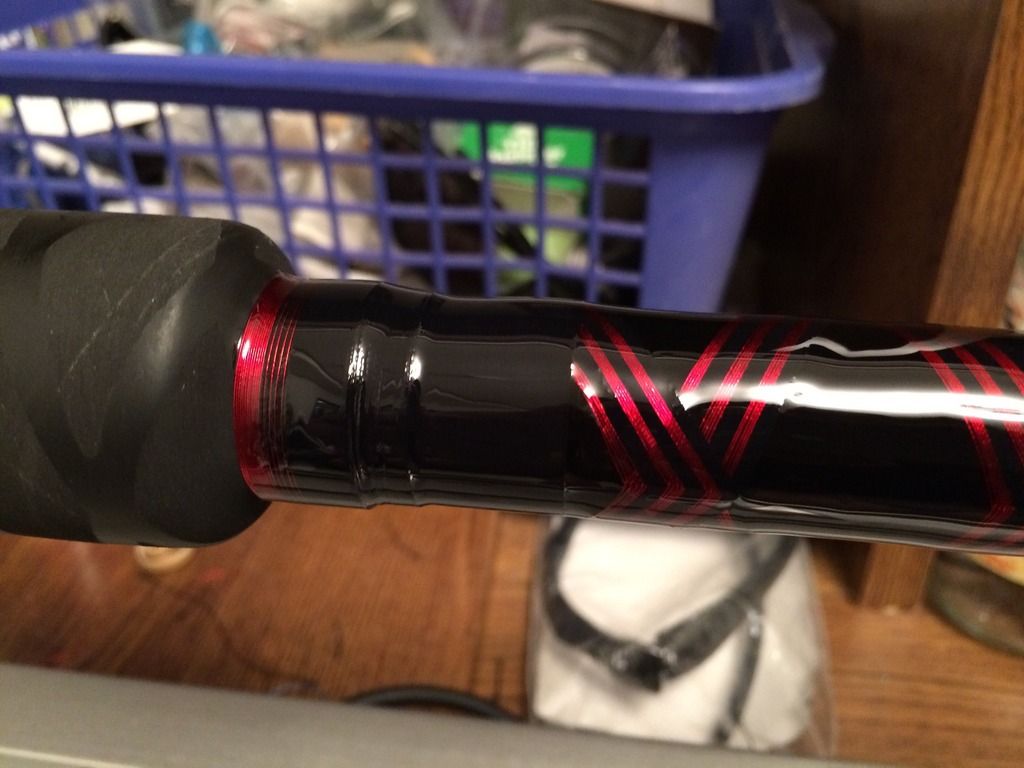
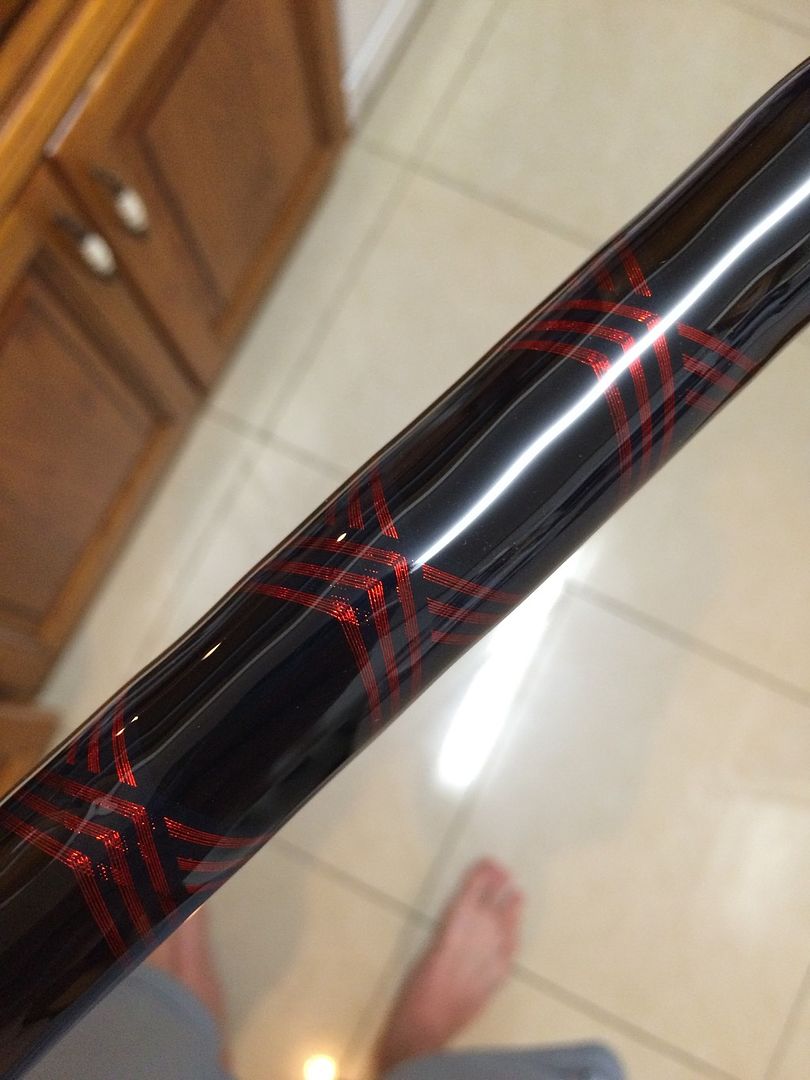
finished it off. three 3 stripe chevrons. simple red and black. not the best pic. after its all done i'm going to have Hannah take pics for me.  ;D


Phase III:  guide layout

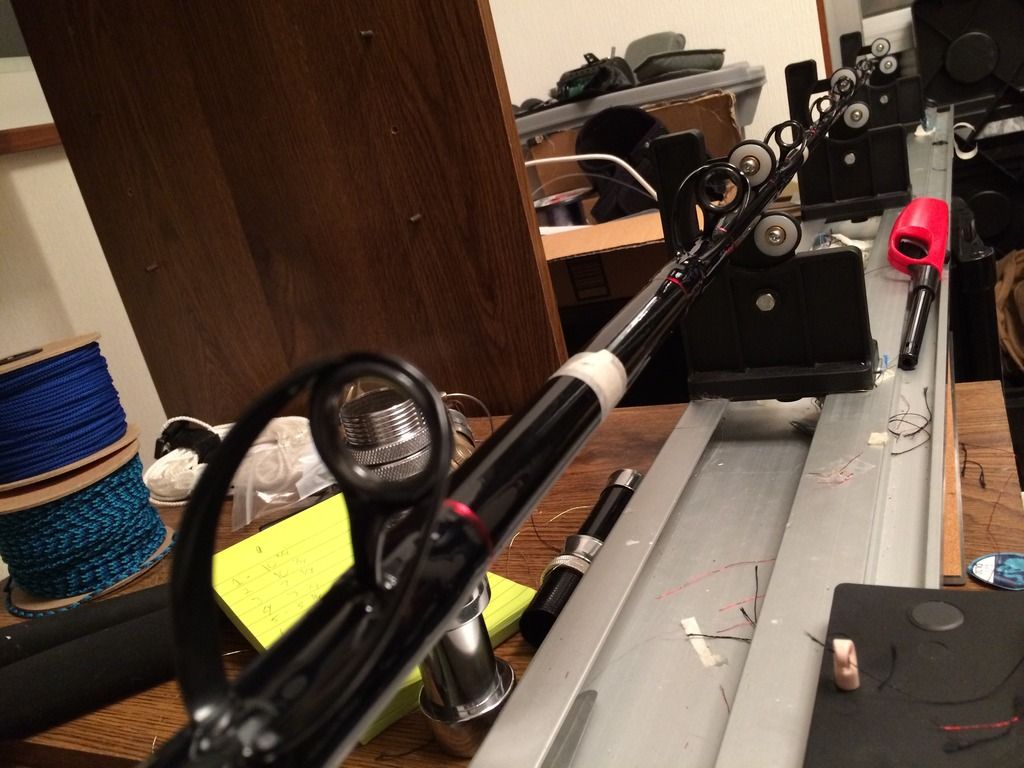
I previously did a rough layout and static test before the handle and decorative were put on so I could figure out where the stripper guide would go and to double check the spine of the rod (make sure it didn't twist when loaded).

here is how I have it set up. the blank is still just shimmed and placed in the furrel, no glue yet. wrapped my harness around the pillars of my balcony wall and I can easily work on setting up the guides. this makes it easy to do splices into hollow core braid as well.  ;D


Phase IV: wrapping the guides.

I started on the first underwrap and ran out of thread.  ;D TO BE CONTINUED!


--------------------------------------------------------------------------------------------------------------------------

spliced in another spool of thread and continued. here's the wraps. simple under wraps and keeping the center of them all black to give it a more stealth look. I want to keep it subdued but still no mistake its custom and its mine.


bad background, but the first guide is almost on. ill eave the front un wrapped until all guides are on then I can align them and wrap the front foot. both feet will be getting double wrapped.


Continued ----------------------------------------------------------------------------------------------------------------------------------------------------------------------

I double over wrapped the feet of the first and second guide and single wrapped (with under wraps) the last 5. first coat went on and it was diluted with whatever my Japanese mentor gave me (acetone?). that coupled with some heat from the lighter ensured a deep penetration of the epoxy finish. now I just have to wait 12 hours for the acetone to evaporate out of the finish so it can dry.  :o

its literally like watching paint dry...


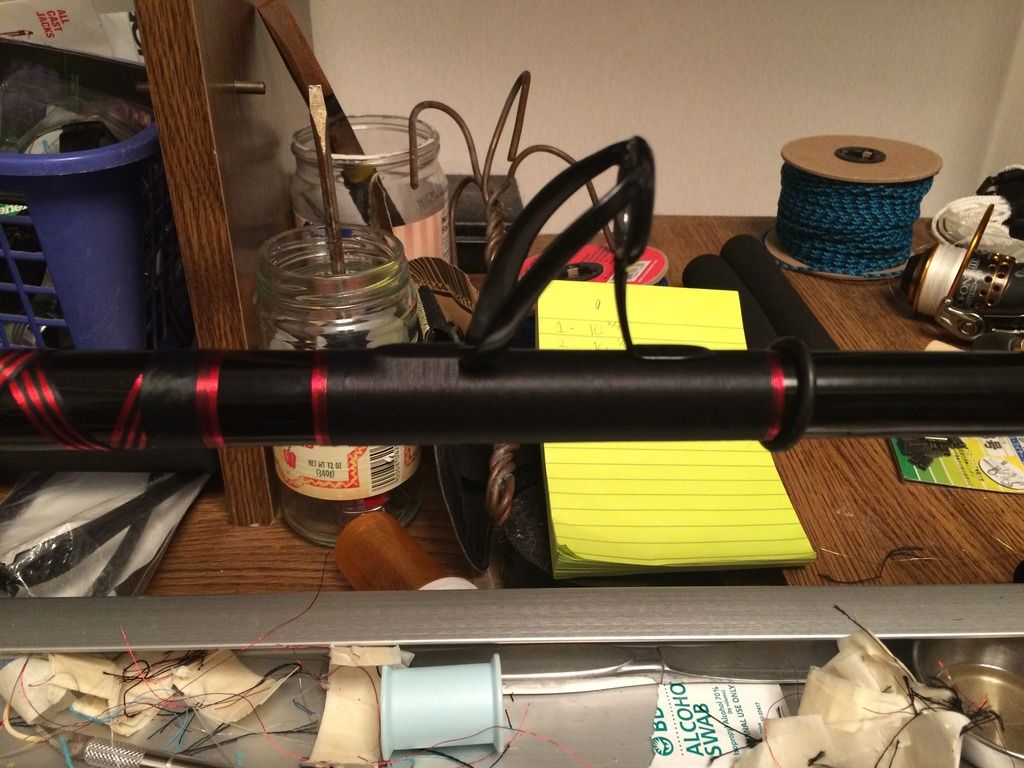
the tape on the blank is for grip. its much easier to turn it by hand while in the chuck with tape than grabbing the blank. with the tape I can easily turn it with two fingers, without it takes 3 or a full grip and can get messy.


tomorrow it will get the final coat of finish, which will set up a bit quicker then hopefully my Rod Bond gets here soon so I can glue the ferrule, put the tip on (its off so the blank can vent when gluing the ferrule on) and then I can go load it up and see if it breaks.  :P

Continued--------------------------------------------------------------------------------------------------------------------------------

the next coat went on the following day but I realized I didn't have any rod bond to glue the ferrule so I ordered some up and it arrive today! quick shipping again from Getbitoutdoors.com ! great guys to work with.

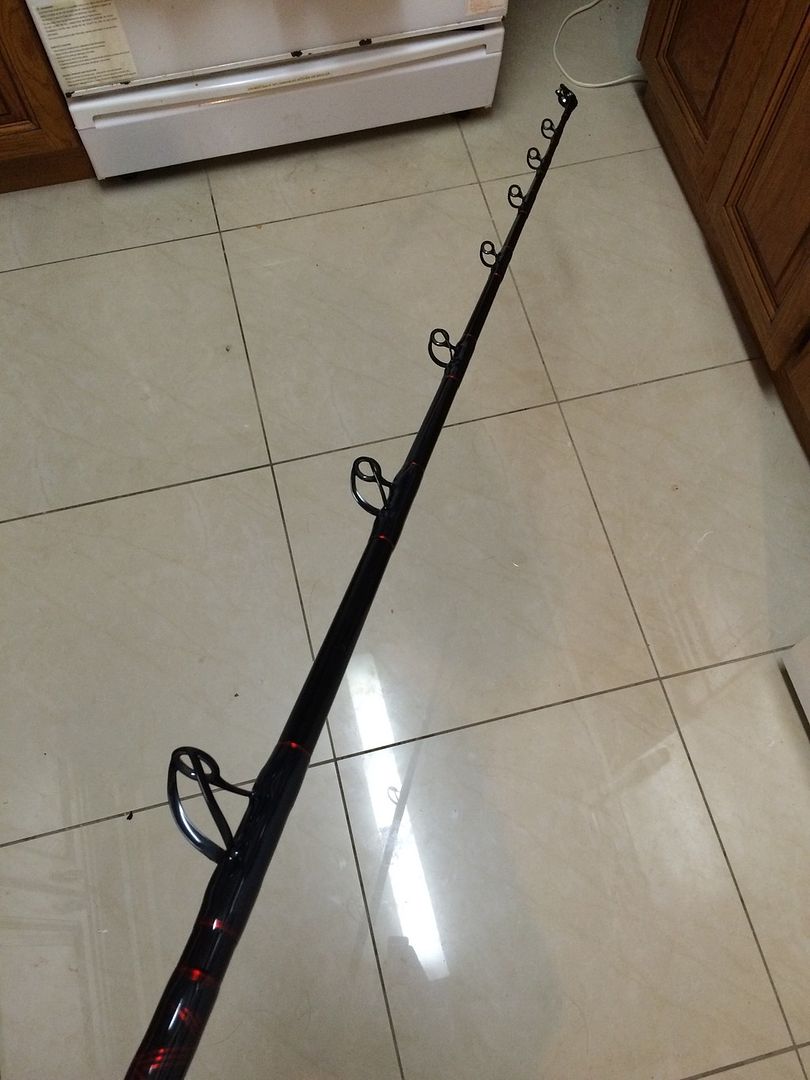
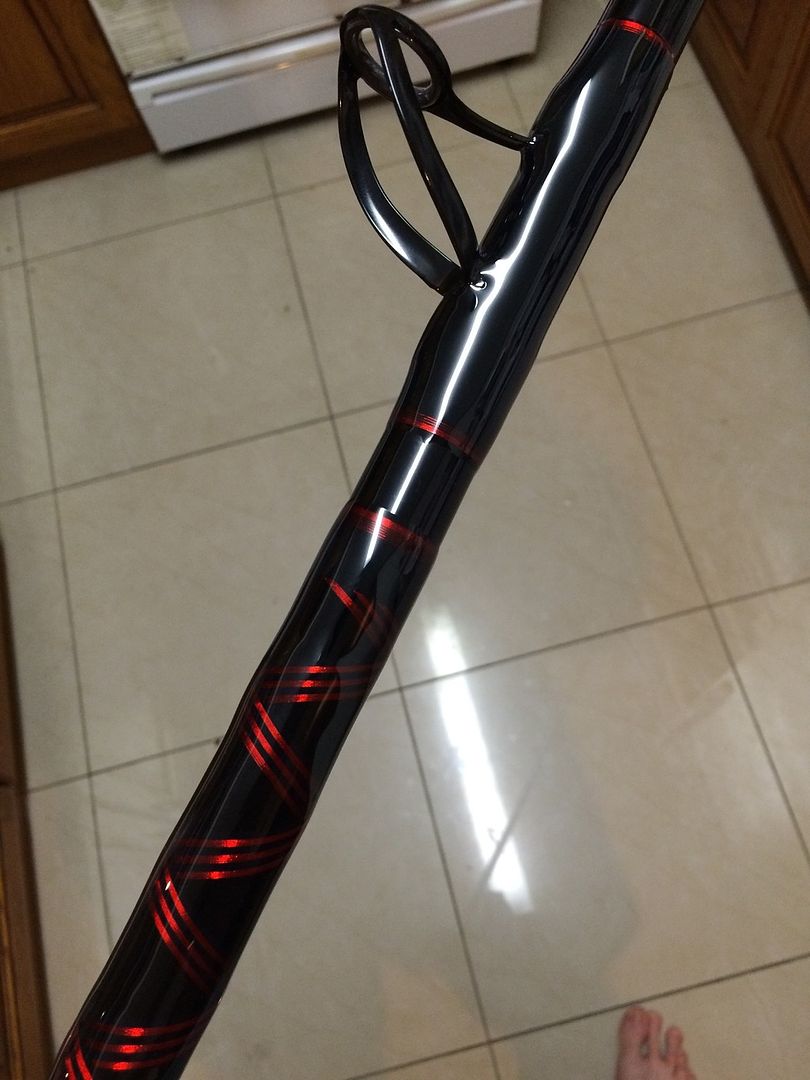
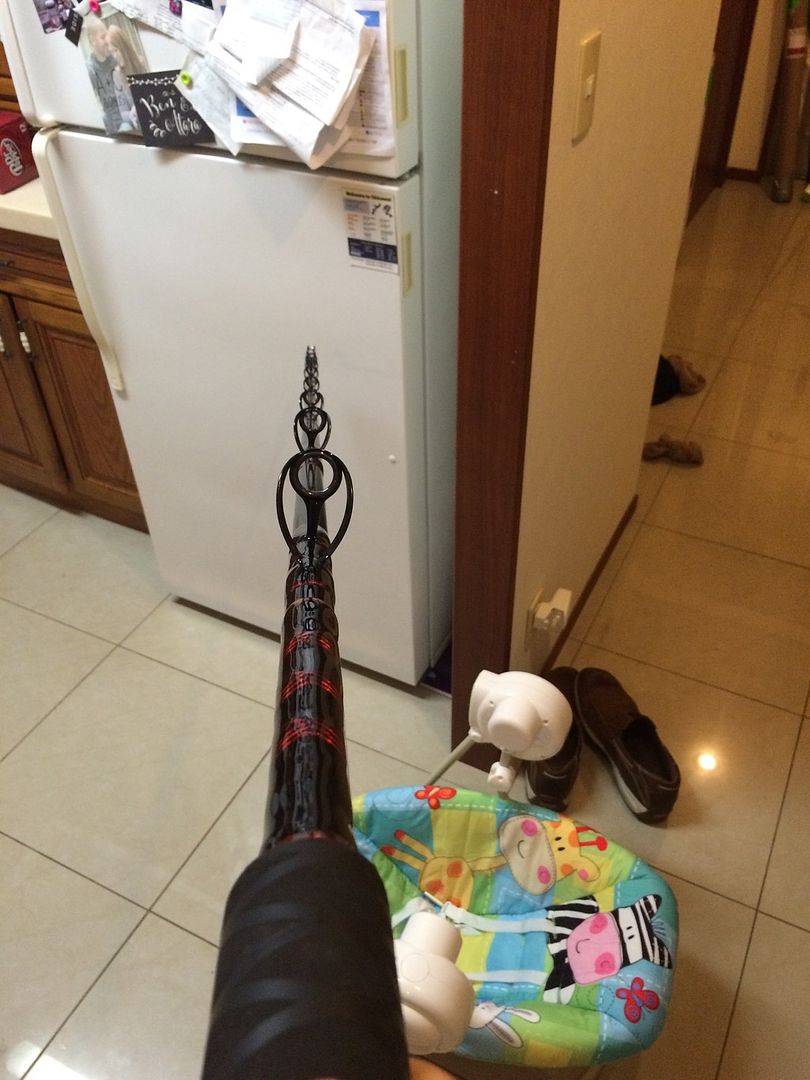
anyways. here's some rough pics of the rod in final form (minus ferrule) for uni butt attachment. the tip isn't glued in the pics, just shimmed and stuck on for looks. tip will be glued after the ferrule sets up.

the red isn't as noticeable in the pics as in real life, but I did accomplish the subdued look I was going for.


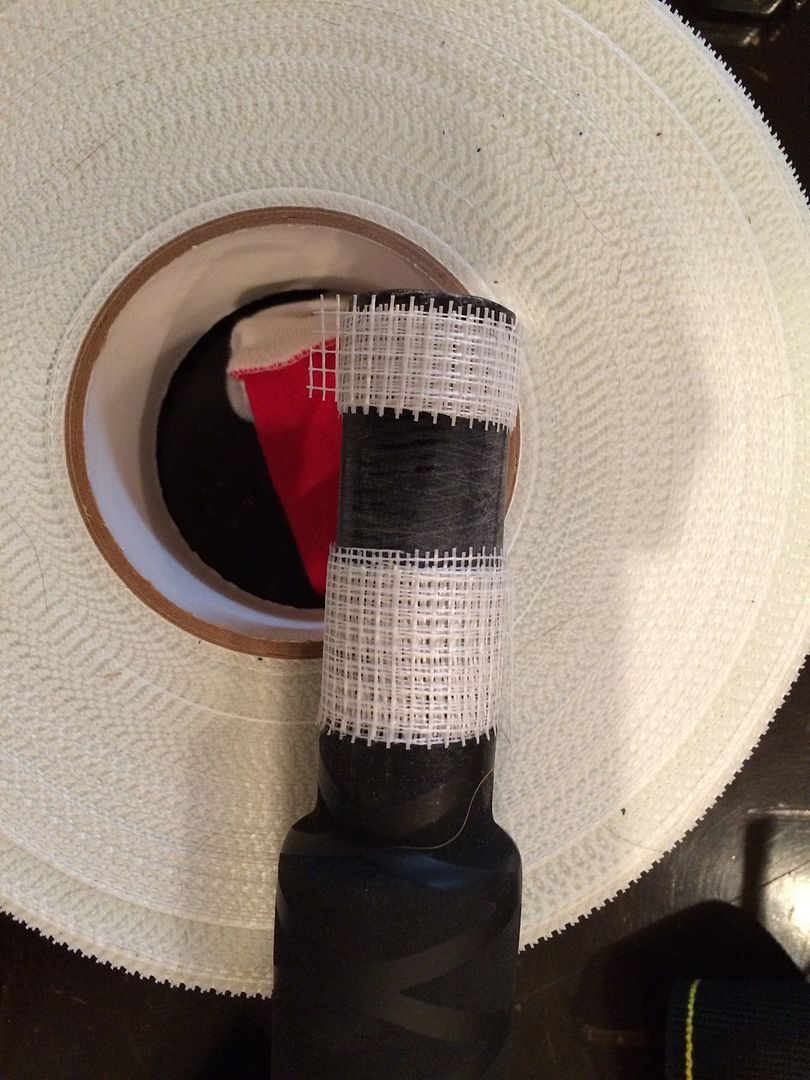
here is how I shimmed the blank for the ferrule and the diameter and thickness of the walls. I used a paint brush to apply the rod bond and got it deep into the mesh of the dry wall tape and filled the gap. I then coated the inside of the ferrule and stuck a big glob on in the bottom and brush some on the bottom of the blank and put a little inside the blank. the shrink tube also acted as a shim and I coated it with glue as well. I'm going to kick myself if I ever have to replace the grips. I'm not even done with this one and I already have orders for 2 more. I'll do those a little different. maybe even do an epoxy ramp.


« Last Edit: March 28, 2015, 08:05:42 AM by Chris »
Keep it tight

Latimeria

  • Administrator
  • Tax Man
  • *****
  • Posts: 8461
  • Posted for Fame, Poached by Lame
    • View Profile
Re: 130lb LBG rod build
« Reply #3 on: March 19, 2015, 07:27:47 AM »
Man, your wrapping skills are awesome Chris!  Beautiful work...  I can't wait to see you holding pics of the rod with some giant fish. 

Killer stuff.  I have two custom rods being wrapped here soon and I can't wait.
You can't catch them from your computer chair.

Jaws

  • Mud Marlin
  • **
  • Posts: 265
  • Bitten by the shark bug!
    • View Profile
    • Sharkbite Photography
Re: 130lb LBG rod build
« Reply #4 on: March 19, 2015, 08:30:11 AM »
That things going to be one glorious beast of a rod!!!
It's all Tom and Don's fault! They "hooked" me on mud marlins and sharks!

SNBF VI  Winner

Chris

  • Leopard
  • ***
  • Posts: 690
  • Put me in coach!
    • View Profile
Re: 130lb LBG rod build
« Reply #5 on: March 19, 2015, 05:36:40 PM »
thanks guys! I can't wait to fish it. I updated my last post with phase III and IV.
Keep it tight

Chris

  • Leopard
  • ***
  • Posts: 690
  • Put me in coach!
    • View Profile
Re: 130lb LBG rod build
« Reply #6 on: March 28, 2015, 08:18:11 AM »
Updated. photo shoot tomorrow hopefully.
Keep it tight

Jaws

  • Mud Marlin
  • **
  • Posts: 265
  • Bitten by the shark bug!
    • View Profile
    • Sharkbite Photography
Re: 130lb LBG rod build
« Reply #7 on: March 28, 2015, 09:48:55 AM »
Didn't think it was possible but that project just keeps looking better and better!!!! I would kill for a set up like that!!!!!  Wish you were still stateside , I would be selling blood to pay you for one! LOL
It's all Tom and Don's fault! They "hooked" me on mud marlins and sharks!

SNBF VI  Winner

Chris

  • Leopard
  • ***
  • Posts: 690
  • Put me in coach!
    • View Profile
Re: 130lb LBG rod build
« Reply #8 on: March 28, 2015, 10:48:25 AM »
Didn't think it was possible but that project just keeps looking better and better!!!! I would kill for a set up like that!!!!!  Wish you were still stateside , I would be selling blood to pay you for one! LOL

I'm currently accepting first borns and pink slips.
Keep it tight

Jaws

  • Mud Marlin
  • **
  • Posts: 265
  • Bitten by the shark bug!
    • View Profile
    • Sharkbite Photography
Re: 130lb LBG rod build
« Reply #9 on: March 28, 2015, 04:42:31 PM »
Didn't think it was possible but that project just keeps looking better and better!!!! I would kill for a set up like that!!!!!  Wish you were still stateside , I would be selling blood to pay you for one! LOL

I'm currently accepting first borns and pink slips.

That was funny! Honestly though when you come back to the states I need to talk to you about a build!
It's all Tom and Don's fault! They "hooked" me on mud marlins and sharks!

SNBF VI  Winner

Latimeria

  • Administrator
  • Tax Man
  • *****
  • Posts: 8461
  • Posted for Fame, Poached by Lame
    • View Profile
Re: 130lb LBG rod build
« Reply #10 on: March 28, 2015, 06:59:50 PM »
That is one fine piece of art you made there Chris.  Very well done once again!   8)

Thanks for the updates on it also.  It is great to see a project like that unfold.
You can't catch them from your computer chair.

Chris

  • Leopard
  • ***
  • Posts: 690
  • Put me in coach!
    • View Profile
Re: 130lb LBG rod build
« Reply #11 on: March 29, 2015, 07:11:15 AM »
Thanks for all the compliments. Joe, you Don't have to wait bro. as long as the sections are 7.5ft and shorter I can ship no problem.

just a recape

Overall length is 7'9"
5'11" glass blank
ALPS UB6 butt custom colored red hoods.
ALPS Ball Bearing roller tip
Fugi BHBNG (SiN) guides. 25,20,16,12,12,12,12 +tip

 I was hoping to use it this weekend but wasn't able to glue the ferrule until last night and it takes 24 hours to set up. maybe when I get back from my business trip the water won't be too hot and I can hook up to something. I sent Matt  the same blank but in white and he built one as well... only he marbled his and has all rollers. He's stuck in 29 palms right now and dying to fish it. lol.  so if anyone wants to soak a huge bait or take him out to drift for some sharks let me know. I think he signed up here, if not I'll remind him to. 


three stripes up!


at 7'9" its just a tad taller than I am.
Keep it tight

Eric H

  • Soupfin
  • ****
  • Posts: 1632
    • View Profile
Re: 130lb LBG rod build
« Reply #12 on: March 29, 2015, 02:21:28 PM »
That thing is bad 8)

SevengillTheVC

  • Leopard
  • ***
  • Posts: 548
  • I don't always catch fish, but when I do....
    • View Profile
Re: 130lb LBG rod build
« Reply #13 on: March 29, 2015, 08:41:17 PM »
Are you gonna add a rocker when you get promoted? Sick looking rod!

Latimeria

  • Administrator
  • Tax Man
  • *****
  • Posts: 8461
  • Posted for Fame, Poached by Lame
    • View Profile
Re: 130lb LBG rod build
« Reply #14 on: March 29, 2015, 08:48:56 PM »
BTW, the stache is killer.
You can't catch them from your computer chair.